


Product Images


In stock
Smart shoppers OnBuy it!
Interest-free payment options available


See full product description & details
Delivery: Standard (Free) | Mon 9th - Fri 13th Nov
Sold by: Small gifts
Returns: 30 days
180-day payment protection








Product
Description
For
Nintendo
Switch
Console
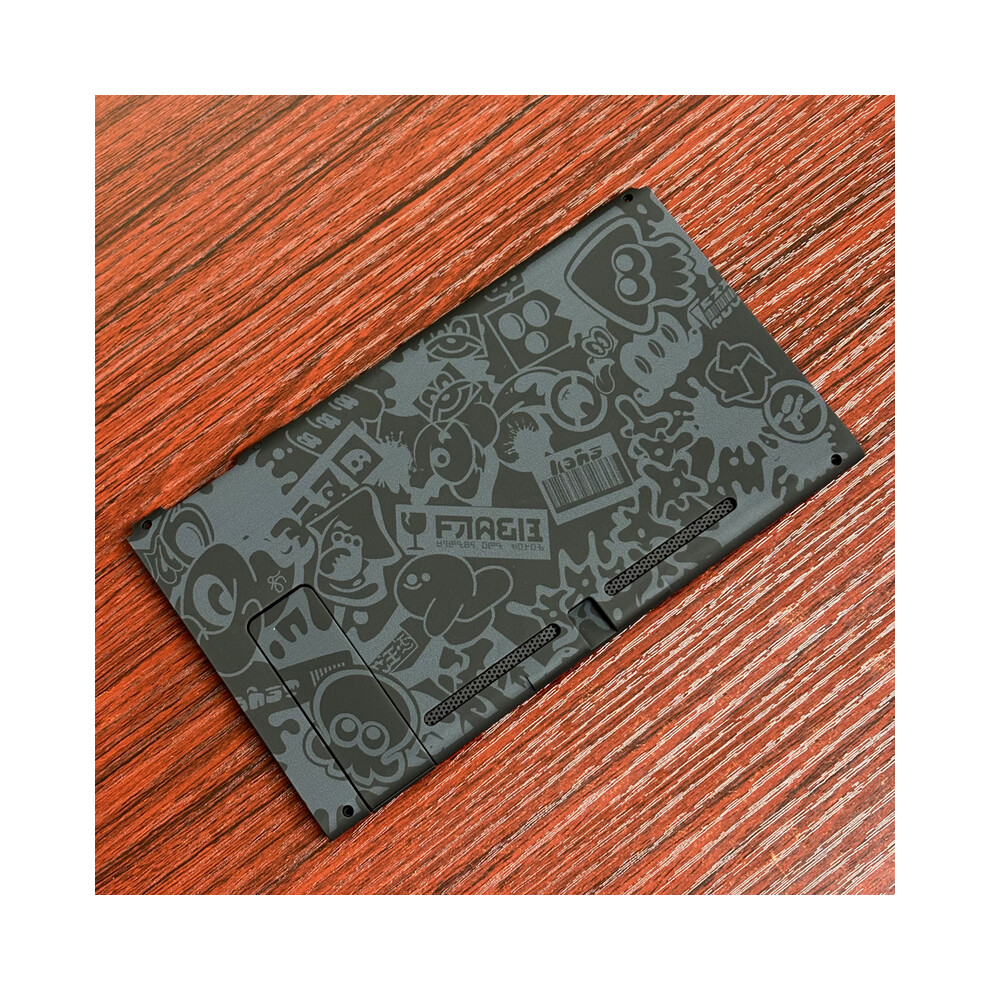
Shell
DIY
Parts
Replacement
Housing
Back
Cover
Bottom
Case
for
SP3
Gaming
Theme
Accessories
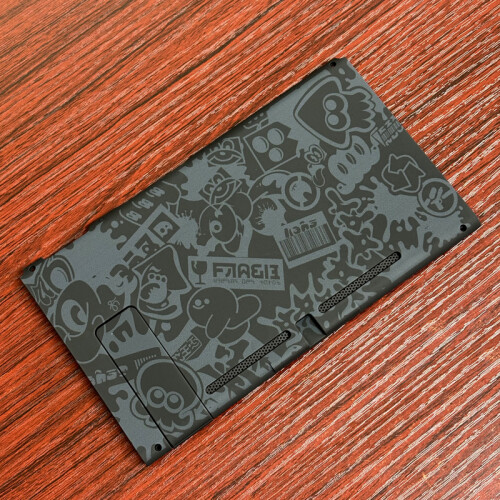
Product
Name:
Replacement
Housing
Shell
for
Nintendo
Switch
Console.
Product
Feature:
--
Totally
upgrade
your
Switch
to
the
exclusive
and
stylish
level.
--
Made
of
durable
non-toxic
ABS
plastic.
--
The
texture
is
not
a
rubberized
finish.
Instead,
it
is
semi-slick,
matte
soft
plastic.
More
comfortable
and
feels
better
in
hands
than
the
stock
shell.
--
The
wood
grain
patterned
design
looks
great;
Great
smooth
grip,
soft
in
hand
and
feels
silky;
Anti
slip,
sweat
free
for
a
long
period
game
playing..
--
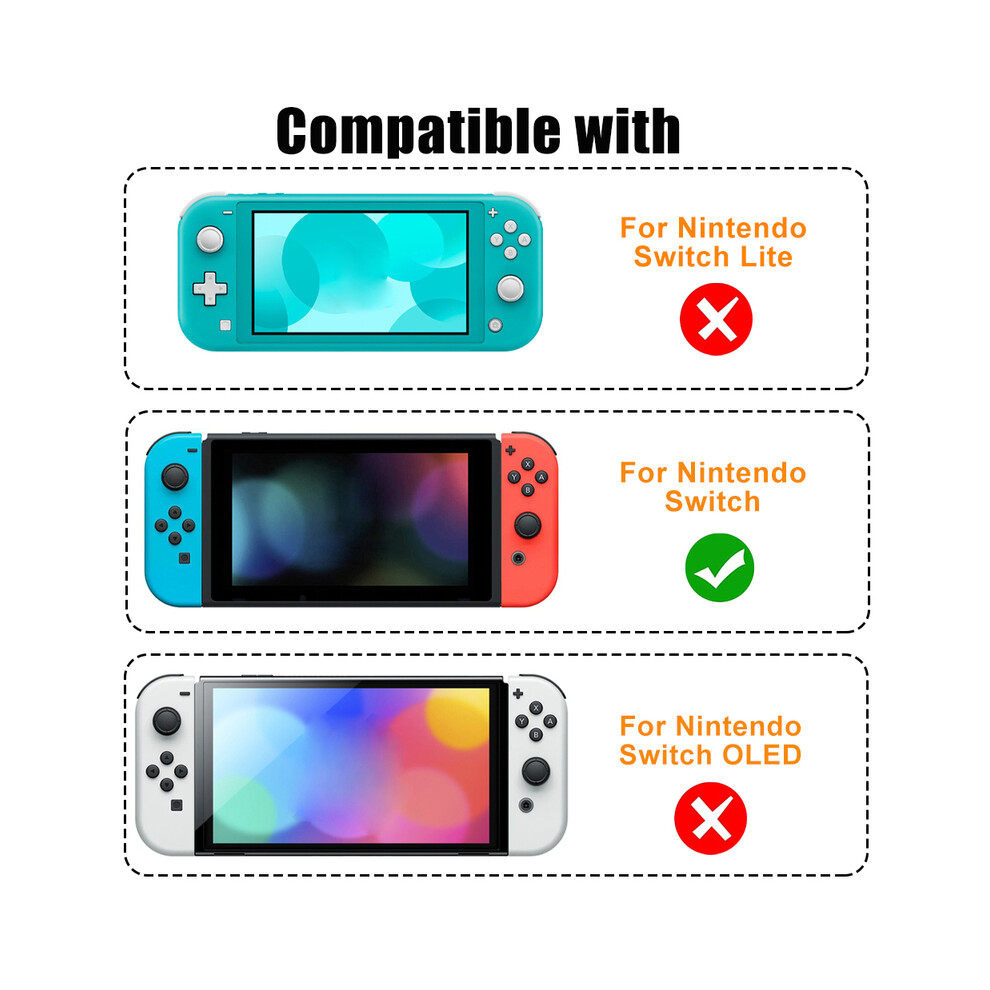
Compatible
with:
For
Nintendo
Switch
Console.
Product
Packaging
Form:
Only
Back
Shell
Package
Include
1x
Back
plate
for
Nintendo
Switch
console
with
Kickstand
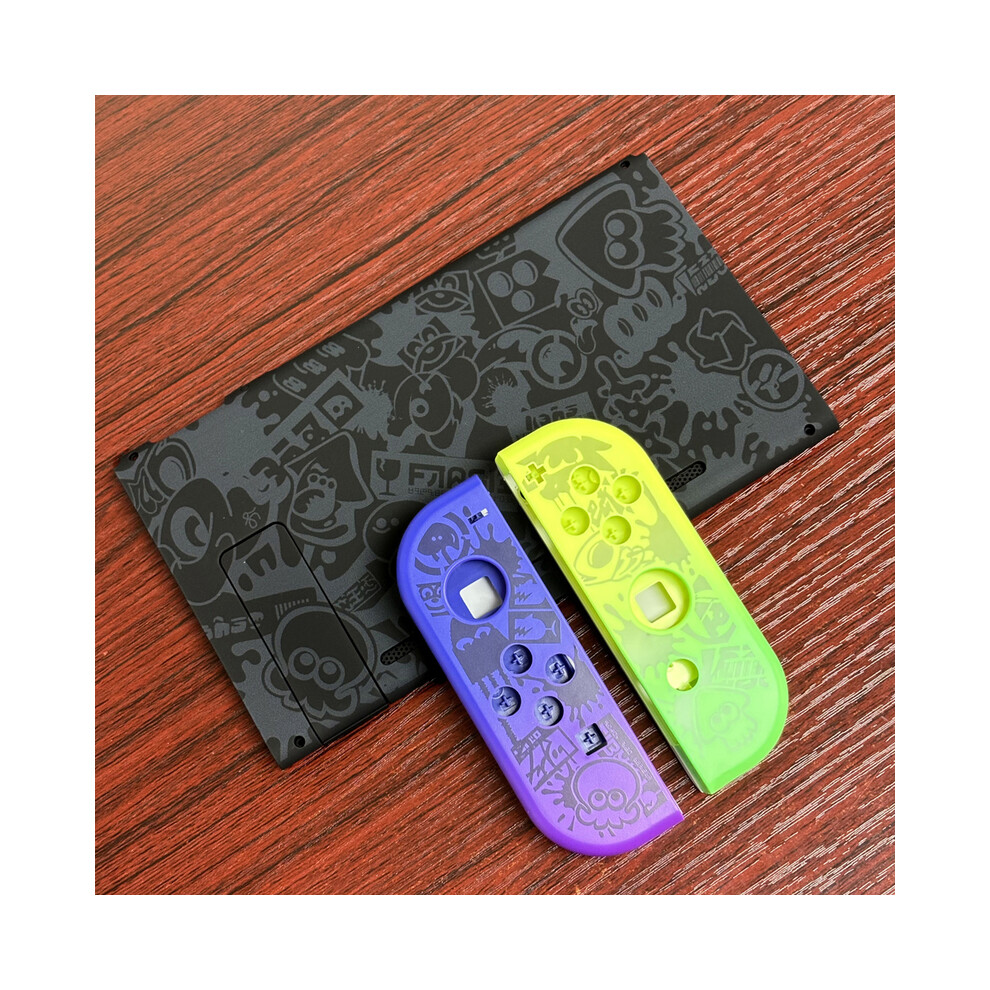
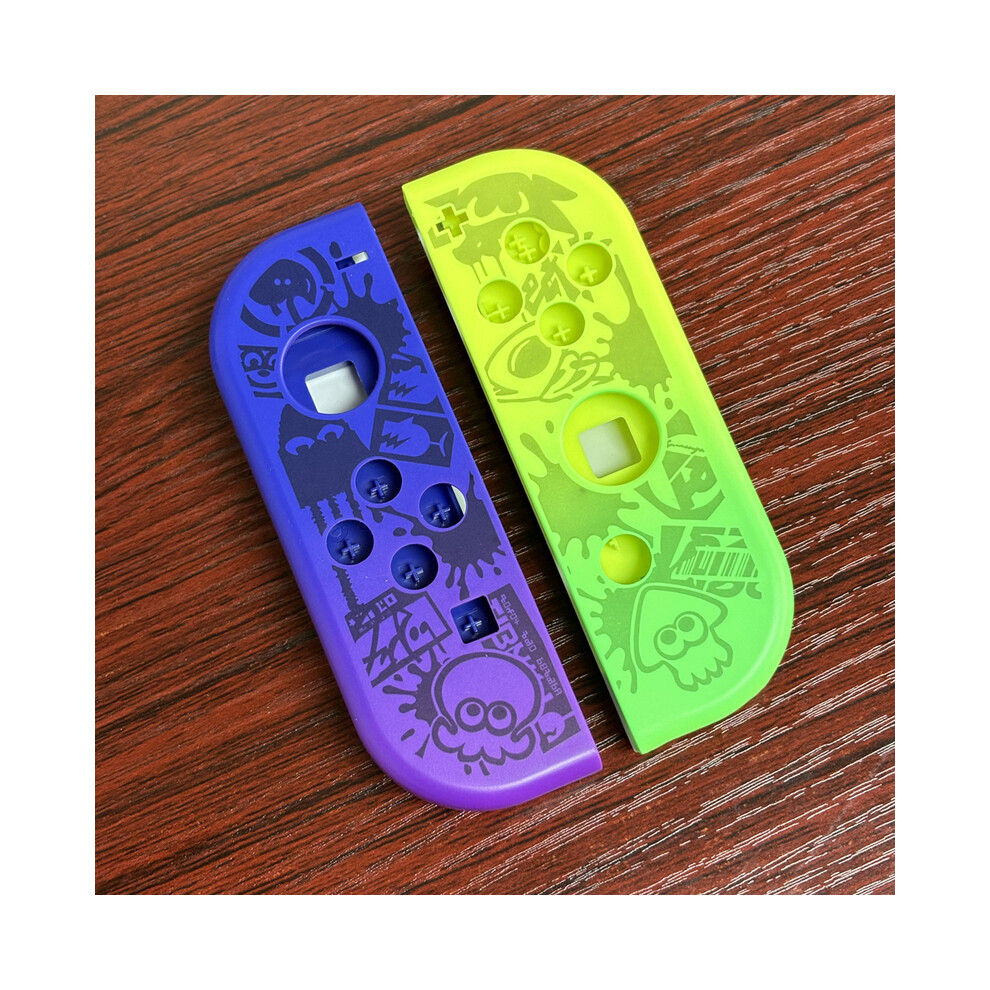
Only
Joy-Con
Shell
Package
Include
1x
Left
Joy
con
housing
with
middle
tray
1x
Right
Joy
con
housing
with
middle
tray
1
Set
SLSR
Buttons
Set
Only
Wrist
Straps
Package
Include
1
Pair
of
Wrist
Strap
Only
Joystick
Caps
Package
Include
4pcs
Joystick
Caps
Only
Card
Box
Package
Include
1x
Game
Card
Box
Installation
Tips:
--
Installation
difficulty:
High
--
Time
spent:
1
hour
or
more
--
Patience
needed:
High
--
Go
slow.
Check
every
connection.
Keep
your
screws
organized.
--
Watch
a
YouTube
video
on
how
to
do
it
though,
pausing
and
replaying
often.
Installation
Notice:
--
When
you
are
reassembling
the
Joy
con
you
must
be
conscious
of
how
tight
you
are
tightening
the
screws
as
that
will
affect
how
your
buttons
press.
--
When
removing
the
Joy
con
outer
screws
make
sure
you
are
using
a
Tri-wing
screwdriver.
Be
careful
not
to
strip
the
4
outer
triangle
screws
or
over
tighten
any
screws.
--
There
are
multiple
very
delicate
ribbon
cables
in
the
Joy
con
that
need
to
be
removed
and
reattached.
--
Use
tweezers
instead
of
bulky
fingers
at
all
time
to
help
with
the
little
pieces
that
you'll
take
to
move
to
the
new
case.
--
Note
that
the
ZR
and
ZL
on
the
Joy
con
are
spring
loaded
so
be
careful
when
opening.
--
Installing
the
console
back-plate
is
easy.
Simply
disassemble
your
original
back
housing
and
kickstand
from
the
Switch,
then
replace
it
with
back
plate
and
kickstand.
Tips
for
disassembly
and
assembly
of
screws
that
are
not
easily
damaged:
--
To
unscrew
the
screws,
please
place
the
screwdriver
perpendicular
to
the
screw,
and
then
force
the
screws
to
rotate.
--
The
installation
screws
need
to
be
tightened
softly
to
the
end,
and
finally
tightened
vigorously
to
fix
them..
Picture
Display
Details
| OPC | PG8NK7R |
|---|---|
| Brand | Maxpower |
| Codes | 9190758646955 (EAN) |
| Links | Nintendo Switch Accessories |
| Seller | Ratings | Warranty | Returns | Price | Delivery | Total | Quantity |
|---|---|---|---|---|---|---|---|
|
Dispatched from:

|
(160 reviews) | - |
30 Days
Free Returns No
|
£16.00
|
+Free Delivery
Est. Delivery:
9th-13th Nov
|
£16.00
|
Earn as you shop with instant Cashback on everything.
No catch, no cost
Become a Cashback VIP
Just 1 purchase unlocks bigger deals & rates
You'll only get instant Cashback at OnBuy! Enter your email below and we'll send you a copy of your basket to save you time later.
By entering your email address, you'll automatically be added to our database, where you can enjoy personalised Cashback offers and early access to our best deals. You can opt out of our emails at any time and we'll never share your details with anyone. Check our Privacy Policy and T&Cs to find out more.
Want access to personalised offers and the highest Cashback rates? Sign up to our emails below.
You can opt out of our emails at any time and we'll never share your details with anyone. Check our Privacy Policy and T&Cs to find out more.
This page has expired.
Refresh and continue